You’re going to meet so many characters in Eiyuden Chronicle: Hundred Heroes. Assuming you’ve played the prequel, then you’re bound to see some familiar faces, too. Here’s our guide on how to solve Runebarrows puzzles in Eiyuden Chronicle: Hundred Heroes. Likewise, please note that this article contains minor spoilers.
How to solve all Runebarrows puzzles in Eiyuden Chronicle: Hundred Heroes
Our Eiyuden Chronicle: Hundred Heroes Runebarrows puzzles guide focuses primarily on the location to the southeast of Arenside. Note that there are other Runebarrows in the game, such as the one north of Arenside (your first main objective in the campaign). The one to the southeast, however, is inaccessible at the start of the game. But you’ll get to unlock it much later after a bit of progression.
Meeting the Rising trio and unlocking the Runebarrows door
To unlock the Runebarrows door, you must gather the three protagonists from Eiyuden Chronicle: Rising. These peeps are Isha, Garoo, and CJ. Here’s what you need to know:
Isha will appear in Eltisweiss after you complete the main objectives in the city of Hishahn. She has several tasks that you need to complete. You can learn about these in our Isha guide.Garoo joins alongside Marisa. This happens after the Hishahn arc and upon completion of Seign’s mini-arc.Once Garoo and Isha are part of the resistance forces, exit the castle HQ and walk along the path to the main gate. CJ will show up, and she’ll tell you to go to the Runebarrows with Garoo and Isha in your party.Upon arriving at the location, CJ unlocks the Runebarrows door. Note that you can leave and return to your base at any time, but CJ will remain at the Runebarrows entranceway until you complete the main objective.
The battle against the Rune Golem
CJ will step on a plate, causing a Rune Golem to appear. This boss will absolutely annihilate your party due to its vicious attacks that deal a ton of damage. In fact, your own teammates will mention that it’s unbeatable. As such, you need to flee the battle. You’re then told that maybe there’s a way to weaken it.
The Runebarrows layout and rewards
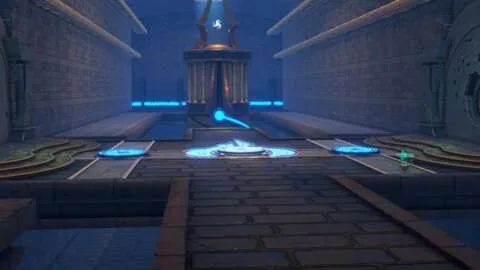
The goal now is to activate mechanisms by solving the Eiyuden Chronicle: Hundred Heroes Runebarrows puzzles. Both the left and right sides are symmetrical, with passages leading to a lower section that also has puzzle mechanisms. The area also has several chests with lots of goodies.
Left side:
Super Lucky BadgeNanami Ice Cream recipeMonster Repel CharmRune of the Warrior’s Path
Right side:
Wealth BadgeFaded Book – Chapter 8Dark Chocolate Cake recipeRune of the Warrior’s Pinnacle
Left side puzzle #1
The Runebarrows puzzles in the Eiyuden Chronicle: Hundred Heroes involve altars that you can move across the floor and place on top of marked circles/activation plates. These objects will slide unless they hit another altar or an obstacle. If they fall down the chasm, the puzzle room will be reset. If you take too many moves (i.e. represented by the glowing blue lines at the top of the screen), the puzzle room will also get reset.
The first puzzle in the left side area is relatively easy. You must move it up, right, down, left, and down again.
Left side puzzle #2
For the second puzzle, we’ve marked down which ones you should interact with:
Move #1 (upper-left) down and right.Move #2 (upper-right) down, right, down, left, and up.
Left side puzzle #3 – Starting out
The third puzzle in the left side area is a bit more complex. You can start things off by doing the following:
Move #1 (bottom) to the right.Move #2 (middle) down and right.Move #3 (top) right and down. It should get blocked by altar #2, though it’s already on top of an activation plate.
Left side puzzle #3 – Finishing up
To finish the whole thing:
Move #1 up one tile, so that it’s on a plate.Move #2 left, up, and right, so that it’s on the last plate.
Right side puzzle #1
The first room along the right-hand side has something that shouldn’t even be called a puzzle. That’s because you need to push the altar to the tile with the plate.
Right side puzzle #2
Do the following for the second puzzle:
Move #1 (leftmost) to the right. It should hit #3.Slide #2 (bottom) to the top, where it hits #2. Lastly, move #3 up, left, and down.
Right side puzzle #3
The third puzzle along the right-hand side has an even wider floor area:
Start by moving #1 (rightmost) left, up, left, and up. It will end up on the topmost plate.Move #2 (topmost) right, then down. It will stay on a plate once it hits #3.Lastly, move #3 (bottom-left) right, up, and left. This will place it on top of the last plate.
How to defeat the Rune Golem
With all puzzles solved, it’s time to battle the Rune Golem. It still has its usual attacks, such as Obelisk Edge, which hits two characters in a column. The good news is that its attacks no longer one-shot your teammates. Still, if you want to avoid the damage, the characters at the right-hand side can use the Attack/Gimmick command to hide behind the pillars.
Once the Rune Golem has been defeated, CJ will permanently join your party. This nets you the third and final member of the Eiyuden Chronicle: Rising trio.
This is how you solve Runebarrows puzzles in Eiyuden Chronicle: Hundred Heroes. Isha, CJ, and Garoo are three familiar faces for those who played the prequel, but this game has 120 allies that you can meet. You can learn about the others in our character recruitment guide.
Eiyuden Chronicle: Hundred Heroes takes you all across the lands of Allraan, where you bolster the resistance forces by allying with powerful combatants and growing your headquarters. For more tips, you can visit our guides hub.

